Tuesday, November 19, 2013

Tuesday, November 12

Updated exterior views


Here is a view walking toward the house on the sidewalk:

Another view standing on the sidewalk from the corner of the property:
The two upper windows have yet to be cut away.


Again another clear November day and the sheathing is on the porch roof.  The dormer continues to need attention to be sure that the new roof blends with the existing roof.


Framing and a Field trip!

Monday, November 11

Framing continues and a field trip...


Today is the Veteran's Day holiday however the framing work continues-
Billy was here for another day along with Brad Webster and his two crew.
They focused on the small dormer and the porch roof.


Here is Alex in the 2nd floor window!
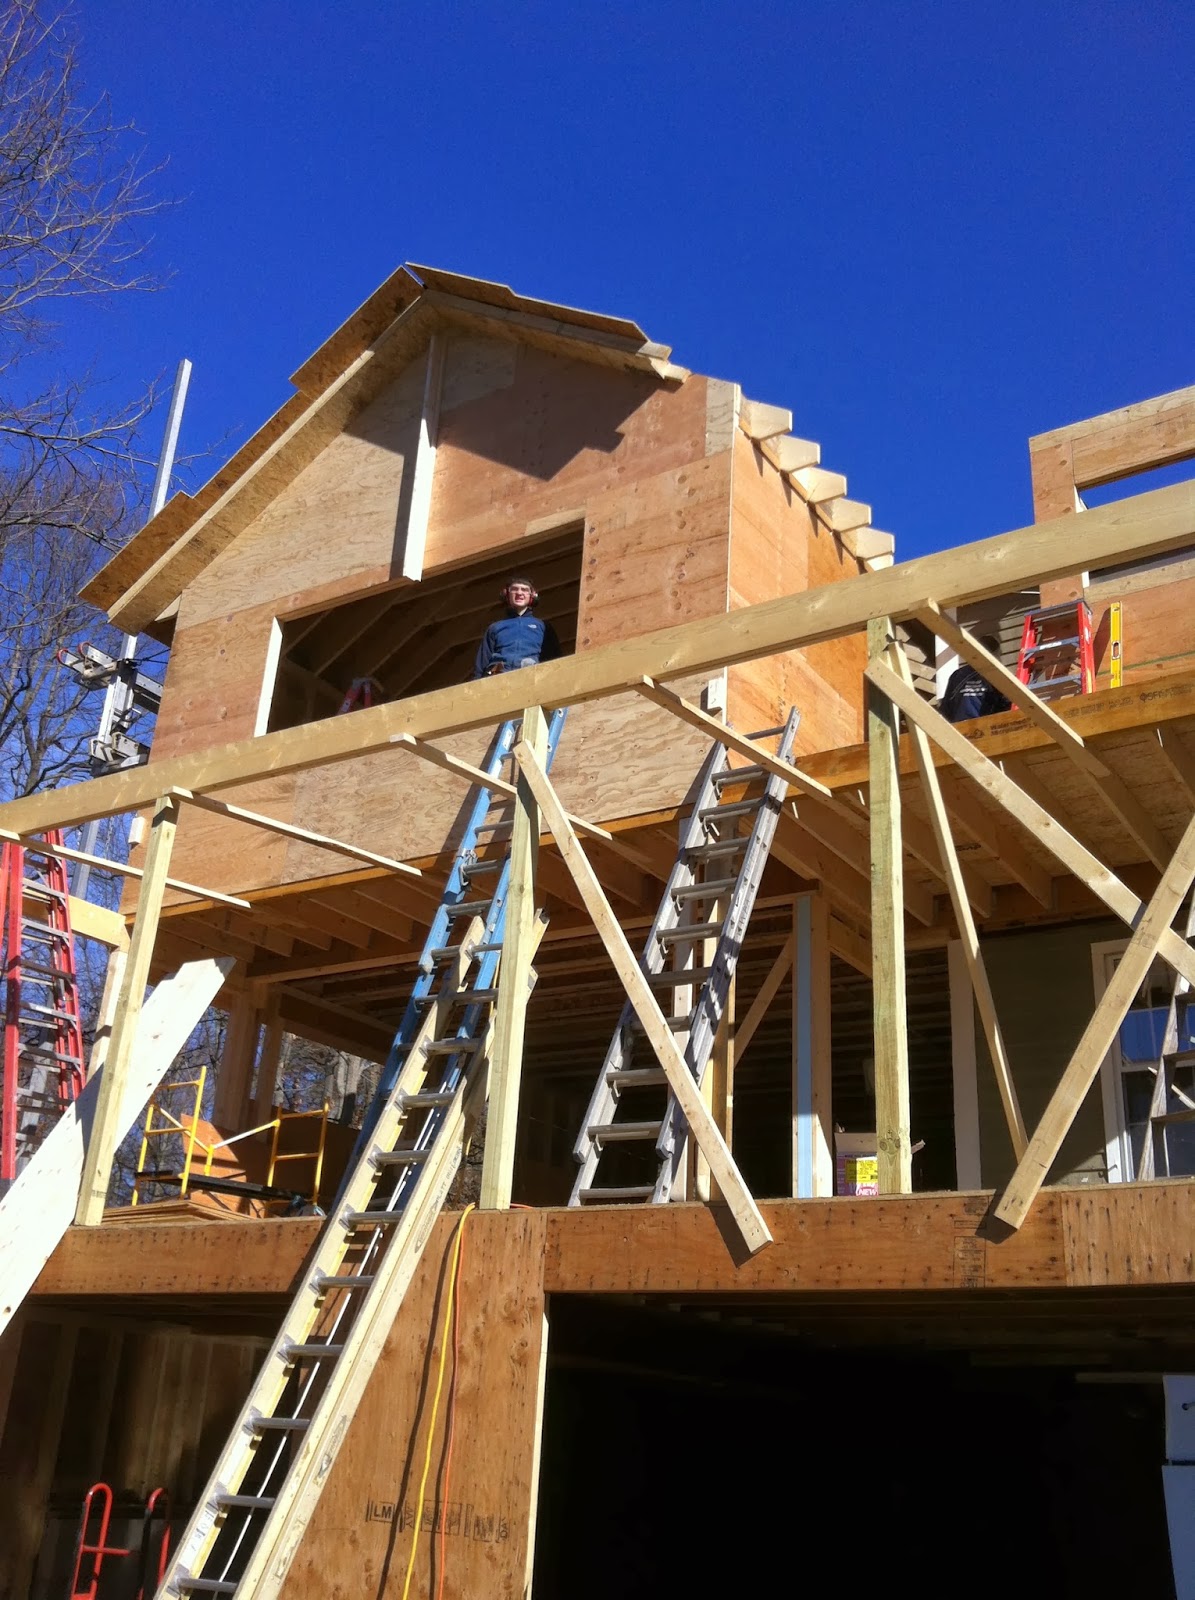
And here is the view from the driveway looking at the back of the new addition.


Also on Monday, there was a field trip to pick up a sink.
This is not just any sink, this is a 300 pound, cast iron and 
porcelain sink that will be a very exciting sink solution for our circa 1938 home.
And yes, "field trip" because Pembroke is approximately 1.5 hours from Groton.

Above is the original Craigslist advertisement.
When I arrived I was thrilled to see the condition of the sinks and drainboards.  
They are all in pristine condition.


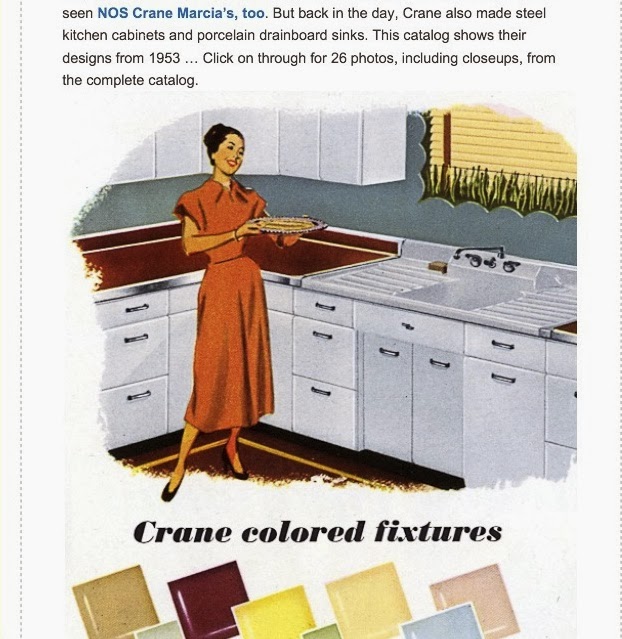
Below is an advertisement from an old catalog that features the "Kitchen Queen"
sink made by Crane.  


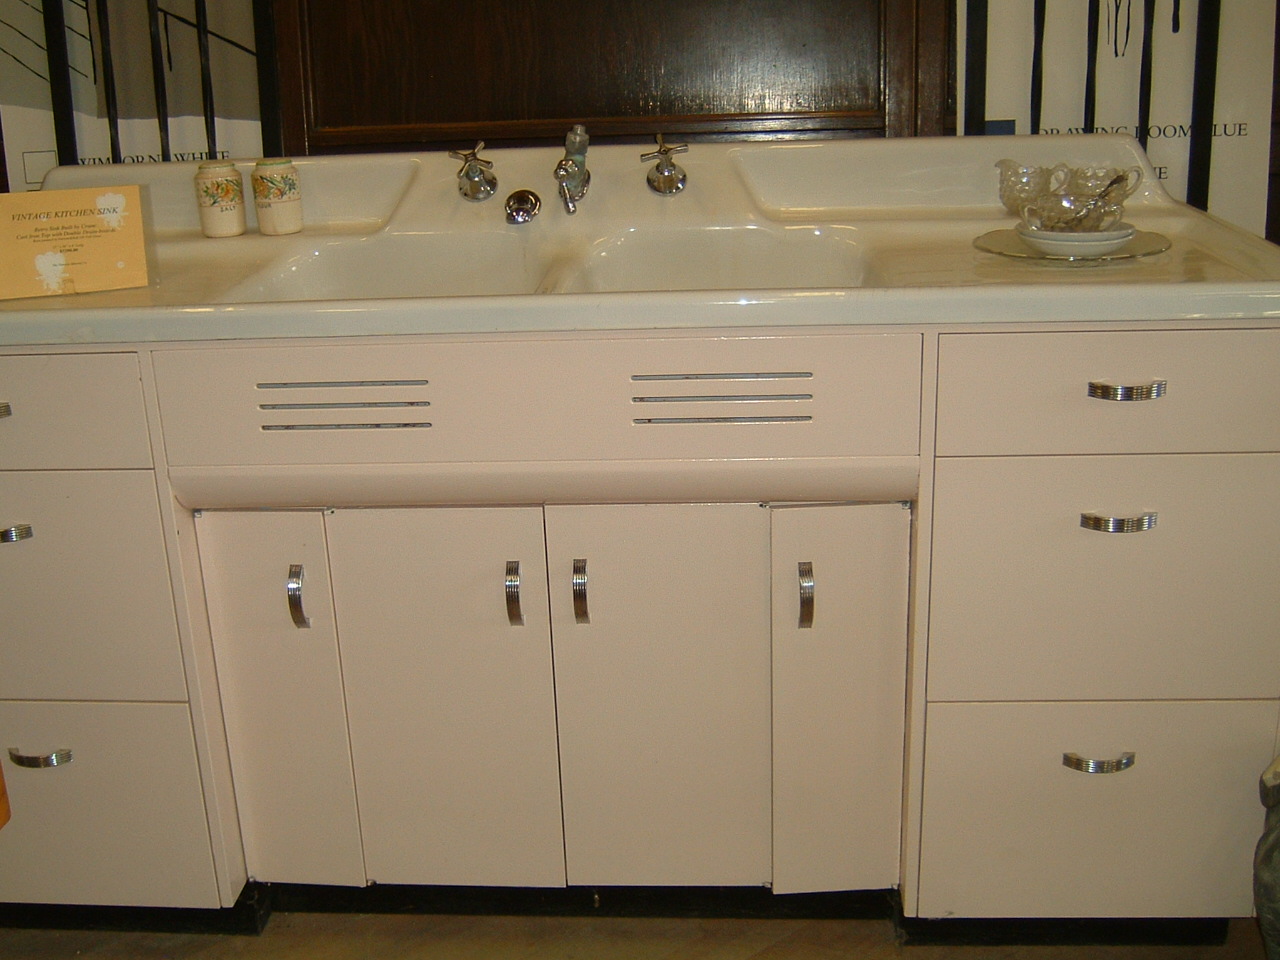
Here is a photo of a "Kitchen Queen" sink in it's original state:
the cabinet below the sink is metal.  This is not our sink, but it is a good depiction of size of the sink and drainboards on the side.


 Arriving home after the 3 hour field trip, the progress is evident: the dormer is taking shape and the screened in porch is beginning to get some rafters.


Sunday, November 17, 2013


Sunday, November 10

Second floor roof and interior view


Here is the view from what used to be the guest room on the second floor.  
This is looking out at the second floor of the new addition.

Looking back at the window standing inside the new addition.  

Moving counter-clockwise, this is looking toward the front of the house 
(toward the street)

It may or may not be easy to find the framing for the windows amongst the framing.  If you study it long enough I think you will be able to see there are 2 smaller windows toward the front, those will be in the future bathroom. 


Here is the view toward the back yard.


And finally here is the view looking toward the driveway side of the house.  There will be a window there even though it has been framed for a solid wall.


Work today primarily consisted of putting sheathing on the roof of the second story.

Friday, November 15, 2013

Second Floor Framing!

Saturday, November 9

The second floor framing is built


Let's get to the main event: 

Billy was back with 5 others on Saturday and along with Halsey they built all three walls of the second floor frame.


Here they are lifting the wall that faces the street.


There will be 2 windows in the wall upstairs, they are framed in but the plywood has not been cut back. 
Here is the second floor back wall being lifted by all of the guys.


Looks great!!!


 And the side wall is lifted in place.
There will be a number of windows along the side, again the plywood has not been cut through yet.
Here is a front view of the house from the yard.


The work progressed so well that Billy decided to continue on and place the ridge beam and some of the rafters!

 Here is the view from the back yard while they are placing the rafters:

 Close to the end of the day- it is taking shape!


 Side view near the raised garden- 
it is a fantastic new addition!


Tuesday, November 12, 2013

Wednesday, November 6

Garage floor is poured


On Tuesday Nov. 5th during the afternoon and evening, after Halsey and Alex placed iron rebar across the foam insulation on the floor, the process of attaching the tubes began. We all took turns attaching the tubing to the rebar using zip ties.
The idea is to heat the garage floor with radiant heat - imagine a warm garage!


The above photos show the garage floor looked like with just the rebar and tubing...
We attached over 200 zip ties onto the tubing and the rebar...looking forward to a nice warm floor!!


Yes, I am the mom of boys, and I enjoy posting more gratuitous cement truck photos!

During the concrete pour...


The floor was poured and the concrete was smoothed from back to front...
Here they are pouring the concrete into the footing Halsey made on Sunday.
I am standing on what will be the new screened-in porch looking down.


We thought it would be fun to color the floor which is a process that is done while the floor is drying so the color seeps into the concrete.  I went up to Home Depot and bought some Quikcrete floor colorant- and made our own custom color...


Which I have to admit looks a little scary going on...but then a trowel and a spreader is used to mix the color all around... and here is the final result the next morning!
We have a gorgeous garage floor - 

No, it is not wet- it is the sealant that gives it the glossy sheen!

We will have to wait about 4 weeks to drive a car on it, however we walked across and 
it is wonderful.

Monday, November 11, 2013

Sunday, November 3

Prep for more footings

After church on Sunday we had a general clean up session and then preparations began for more footings that will be poured on Wednesday with the garage floor.


Here are a few action pictures of Halsey on his tractor tearing down the wall where the future door to the future mudroom will be.


Halsey cut away the asphalt driveway next to the house to dig a ditch for the footing.

Here it is, late afternoon and the footing is ready for Wednesday.


On this day, here is the front of the house.  We have moved all of the lumber behind the house so that the front looks very clean.  We have even put down some annual winter rye grass seed so perhaps we can have a little bit of ground cover in a week or two.
(Unless it snows!!)


Moving inside, the afternoon light streams into the new kitchen space and we are looking forward to having much more natural light in our kitchen.


The side door remains intact for now.


Here is the view from inside the new kitchen looking out toward the driveway and back yard, through what will be the new screened-in porch.  The picture on the right shows the rest of the screened-in porch.
I